

This is Patti’s Urban Winter quilt and the pattern is by Sew Kind of Wonderful using the Quick Curve Ruler. Patti had a wonderful story to go along with this quilt as it has a special meaning to her. She was on a Balkan river cruise and she meet a woman from Toronto who knew of a family who did indigo dyeing with dyes that have been used for generations in that Hungarian region. They took a city tram underground and a train from Budapest to a small village and found the shop. Patti bought fat quarters of each design in their hand dyed collection. She carried it all the way through the 7 other countries on their trip on her carry on luggage! I think all of us quilters can related to finding that special fabric that is worth filling our luggage and hauling around until we get home! And what a wonderful reminder of an amazing trip.

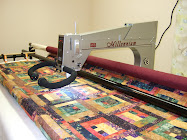
Now to talk about the quilting! I came up with a few designs and let Patti pick, she liked the simplicity of the feather wreath so we went with that one! I also did a feather motif in the navy curved piece and did loops in the square design. All the elements are stitched on the ditch and I used white So Fine thread on top and white Bottom Line on the back in the white fabrics. In the navy fabrics I used Navy So Fine on top and Navy Bottom Line on the back.


I love the texture of the quilting on this quilt at shows up using Quilters Dream Blend batting.


I shared this next quilting tip on Instagram and was surprized at how many quilters didn’t know about this trick! If you have a black light on your longarm, all APQS Millenniums have them, you can use it to see Pounce chalk on white fabric! I wanted to use a stencil as a guide for my wreath but didn’t want to using a marking pen, that takes forever! So I used the Pounce, turned on my black light and voila…I can see the white chalk on the fabric. You might notice that the stencil and the finished wreath are quite different, that is because I wanted to quilt open feathers and just used the stencil as a guide, really helps getting those inside feathers even!


This week I also made myself a design wall for the studio. I bought 2 – 4x8 sheet of insulation board and covered them each with one twin batt of Dream Poly.

I hot glued the edge of the batting to the back of the boards after pinning the batting in place, making sure the batting on the front was nice and smooth.

Once the glue was dry I discovered that the two boards fit perfectly in my nook where I just put in my cutting area. Just need to make a few larger bean bags to place on the floor so they don’t slip forward! I tested it out by laying out my Scrappy City Slicker quilt and next thing I know I had the top sewn together! Hope to quilt that one over my Christmas break!


Having two boards means you can slide one in front of the other, or scoot them out of the cutting area. Great idea to have small bean bags to hold them upright.What gorgeous blues, and superb quilting that is the perfect finish.
ReplyDeleteI store the two boards in the corner of the room beside my fabric stash cupboard. They are out of the way and easy to access when I need them! 😀
DeleteI so envy your feather wreaths. I've just finished a quilt and ended up drawing mine freehand with the little disc thing that holds the thread onto the sewing machine (just the right size) - and now I see oh dear - how much better they'd be with the stencil - or not in my case (I can hope for slightly better) LOL!!!! Never thought about stencils! Thank you! Lovely quilt and the quilting is beautiful.
ReplyDeleteLove the quilt and your quilting suits it perfectly. I really appreciate the tip about the Pounce chalk. I'll have to try that out. Love your idea about the design boards too.
ReplyDeleteWhat a wonderful bit of serendipity that the design boards fit your cutting nook. It's almost as if you planned it that way on purpose.
ReplyDeleteStunning fabrics, stunning piecing, stunning quilting. I love it. Great job, Patti and Kathy.
ReplyDeleteBeautiful fabrics and gorgeous quilting! This quilt will surely be treasured for many generations!
ReplyDeleteI have just tried your black light tip with my chalk wheel and my son's tiny black light torch. And it works a treat! I am so excited!!! It's going to be infinitely useful. Thanks so much for sharing this tip.... it must be the world's most secret quilting fact, I have never heard this before!
ReplyDeleteLove the backstory for this quilt! Your design boards are perfect! I should do that with big mobile ones, too. I've got a smaller size mounted on my wall over my sewing machine, which is fantastic for long-term BOMs and pretty things to see, but not so practical, nor big enough, for when I have a large quilt's blocks to lay out and fiddle with. These could be moved into my storage room when not in use, and would be a lot safer from feline rearranging than the current floor spot is. Thanks for sharing that tip about the chalk on white showing up in the black lights. I didn't know about that, and it's the perfect tactic for the last top I just put together.
ReplyDeleteLove the story behind the travelling fabrics. You did a beautiful job, I can only hope to have my feathers look like that! Love the pounce and black light idea. I have a quilt 'stuck', ready to go, this idea will propel me to start. I was planning for the diamond shape with feathers like this. Lovely quilt.
ReplyDeleteI adore that blue and white quilt...like a nice tidy, clean house feeling.
ReplyDelete