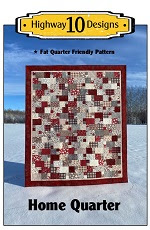
Lucinda made this lovely quilt using a pattern by Kitchen Table Quilting called The Glenda Quilt.
.
I quilted it with the Bayside pantograph, used a light grey So Fine thread and Quilters Dream Blend batting.
The backing is a grey Stonehenge wide back.
I want to share a trick I learnt last week using my iPhone for taking quilt pictures. I stumbled upon this by accident when editing my photos on my phone. There is a feature in the photo edit section where you can change the horizontal and vertical perspective. I'll take you through the steps. Here is the before on the left and after on the right, its the same photo! Its a real game changer for upping your quilt photography.
Select 'Edit" on the photo you want to edit. Tap the 'Rotate/Crop/Flip" button at the bottom.
I then tapped the Rotate clockwise button at the top to rotate my photo ( you might not have to do this). Then I tapped the Vertical Perspective button at the bottom of the screen ( middle circle).
Now drag the slider until you have the quilt image square, a grid will appear so you can easily see when you have the right angle. Then click Done. You now have a straight perspective and I didn't notice any distortion to the edited photo.
You can also adjust the horizontal perspective ( third circle) and straighten a photo ( first circle) with these buttons at the bottom of the screen as well.


Such a pretty quilt, like a storm at sea setting. Thank You for the photography trick, that always annoys me. Now I can fix the photos no sweat. Awesome!
ReplyDeleteThanks so much. This helped me figure out how to do this on my Android.
ReplyDeleteThanks for the photography tip! That is a game changer!
ReplyDeleteGreat photo tip! Love your quilt.
ReplyDeleteGreat tip! Love the colour variation on your quilt. I pinned it, hope that's ok.. :))
ReplyDelete