

Now you may be wondering what is a Microwaveable fabric bowl….well it’s a hot pad that allows you to take a hot bowl right out of the microwave without burning your hands! If you have teenagers like I do you will agree this idea is great!

I was first introduced to these bowls at a guild meeting when Marg showed us a set she made with her winter quilting group in Arizona. They had discovered a tutorial on a quilting forum for these bowls and I asked Marg to showed me how to make them so I can teach them at our guild meeting this month. She made a few improvement to the original tutorial so I thought I would share the new and improved version with you. So I did not design these bowls and if you know who did I would love to give them credit as it is a genius idea! The quilter that did the first tutorial said she was not the original designer.
The most important thing you have to remember about this project is you must use 100% cotton for all your materials…including thread as this is going into the microwave! Also do not use fabrics with metallic prints or sparks will fly!
The set you see above is made from 8”, 10” and 12” squares. For each bowl you need two squares of fabric and two squares of batting all cut to the same size. I like to use the same two coordinating fabrics for each bowl in a set.
Here is what you need to make one bowl.

Step One – On the squares of batting mark a center horizontal and vertical line.
Step Two - Mark a small line on all four center lines measuring from the outside edge. For the 8” square measure 2” from the outer edge, for a 10” square measure in 2 1/2” and for the 12” square measure in 3”.

Step Three – Layer a square of batting on the wrong side of the fabric square. Pin on the center lines as show. You will have two of these for one bowl.

Step Four - Fold the square in half on one of the lines and stitch a dart from the small line to the outer edge. For the 8” square make your dart 1/2” wide on the outer edge, for the 10” square make it 3/4” and for the 12” square make the dart 1” wide at the outer edge.

Do this on all four sides.

The fabric side of the bowl will look like this. You will have two of these in different colors but the same size.

Step Five – Clip extra batting from the darts, this will eliminate some bulk.


Step Six – Take these two fabric squares with batting now attached and layer them right sides together. Stitch the two layers together leaving a 3” opening.
The bowl will now look like this.

When you piece these two layers together make sure your darts are alternating direction to eliminate bulk.

Also when you are stitching around the corners do not pivot sharply but take an extra stitch or two on the angle to round the corner.

Step Seven – Trim extra batting around the outer seam allowance on both sides and clip the extra fabric in the corners on an angle.

Step Eight – Now you are ready to turn the bowl right side out. Once right side out topstitch the outer edge and this will close the opening. You can then quilt a design in the center of the bowl to hold the layers together and create a firmer bottom to the bowl.


You are now ready to use your bowl in your microwave! You can also use this to hold a cold ice cream bowl too! :)
Here is a complete set of three bowls that nestle nicely together.

Hope your enjoyed this tutorial!
Kathy


Cool idea and very clear instructions! This would make a great hostess or teacher gift.
ReplyDeleteThank you for sharing
ReplyDeleteWhat a great idea!
What a nice "new-to-me" idea for a great gift! Thanks for your clear directions.
ReplyDeleteWhat a great idea, thanks Kathy
ReplyDeleteThank you so much for this tutorial, Kathy! Until now I had no idea what to do for Christmas gifts for extended family. :D (Needed something fast that uses things I already have) You're a life saver! :D
ReplyDeleteWhat a great idea!!! I'm going to make one of these as soon as I get to town for some 100% cotton batting. Thanks for sharing.
ReplyDeletebonjour,
ReplyDeleteles filles du forum "patch to patch" ont testé et l'avis: l'essayer c'est l’adopter et surtout très simple à réaliser encore merci
martine
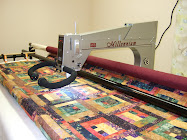
what a great idea for the microwave- you do fabulous long arm quilting.
ReplyDeleteThe bedrunner quilt is quite spectacular and the geometric quilting certainly highlights the design.
This has been a fun blog hop around our Canadian landscape. It has been fun to be introduced to so many creative Canadian quilters.
Regards from Edmonton,
Anna
Thanks for the tutorial! It is very clear.
ReplyDeleteThanks for sharing this great idea. Your tutorial is very clear and easy to follow. Thanks for taking the time to make it.
ReplyDeleteI will put a link to this tute in my guild newsletters - thank you!!! Nice clean microwave, by the way. :-)
ReplyDeleteFabulous tutorial - can't wait to make some.
ReplyDeleteI have been reading all your posts on dyeing and snow dyeing - such great help - thank-you! I am trying my first dyeing this weekend after taking the Craftsy class. Fingers crossed!!
Is it ok to use mercerized cotton thread?
ReplyDeleteYes you can use mercerized cotton as that is just cotton thread that has gone through a chemical and heating process to soften and add shine to the cotton. So as long as it is 100% mercerized cotton then it will work.
ReplyDeleteKathy - this is an great tutorial! I can't wait to try these. Such a perfect gift as well.
ReplyDeleteThanks so much!
Hi, Kathy ~ Just wanted to let you know that I tried out this tutorial and blogged about it here (hope you don't mind!) http://theshyonesews.blogspot.com/2013/12/a-little-finish-for-friday.html Can't wait to make more!! Thanks for sharing it!
ReplyDeleteGreat tutorial! I made the 10" one and I am very pleased with it! Thanks for the tutorial!
ReplyDeleteI love this idea , I will be making some soon! Beautiful colors too! Thank you for posting about this !
ReplyDeleteI recently saw Sue Hausmann of the America Sews PBS television series refer to bowl buddies and explain how they're made, but I can't remember where she said she got the idea. She offered a tip that people may want to consider: in order to prevent fire, you might want to use a special batting made for use in microwaves. I use a brand called Wrap-N-Zap that I pick up from my local Joann's craft store in Florida. Great tutorial and just what I was looking for...I wanted to find a tutorial instead of winging it on my own!
ReplyDeleteThank you for the tutorial. A great idea for the quilting ladies to sell at the Christmas Bazaar to earn money for missions. Thank you again.
ReplyDeleteThanks so much for your tutorial. I've made 2 already and have 2 more cut out. A great way to use up left over fabric. I had a Layer cake (10 inch squares) that had 7 leftover squares. 6 of them are now (or soon will be) bowls. I made one other out of 4 left over charm squares that I stitched together to make a 9 1/2 inch square. Thanks!
ReplyDeleteWhen you make these, do you preshrink all materials? The fabric? The batting? The thread? That probably sounds crazy, but I'd like to avoid serious shrinkage when the finished item is washed and dried? Thank you.
ReplyDeleteI didn't but that would be a good idea to prewash the fabric and batting ( I wouldn't worry about the thread) as they do get a lot of washing and do change shape over time. You can also quilt them heavier than I did and that will help them hold their shape too.
DeleteI have sewn several bowl holders and am working on another. Suddenly, my stitches are unbalanced. I am using red thread in the bobbin and white on the top because the two fabrics I chose need stitching that matches the thread. I've done this on other bowl covers with no problem. Now, the white thread is showing on the red fabric. It looks like red dashes and white dots. I have not changed my tension and have already checked the bobbin and the top thread to be sure I threaded everything correctly, but still I have the problem. Do you know what might be causing this? Thank you.
DeleteYes that is a tension issue and you need to tighten your top tension disk so the white thread doesn't get pulled to the bottom.
DeleteOh boy. I've already made 8 of these & gave 2 away. I used a different tutorial & didn't see anything about only using 100% cotton. All my thread was polyester. Will these catch on fire?
ReplyDeleteProbably not catch fire but the thread would likely melt first! Test the ones you made! I just use mine for warming up food and only have them in the microwave for 1 to 2 minutes. I wouldn't have them in for more than 3 minutes.
DeleteThank you for this tutorial. It was easy to follow and I made a whole set for my mom in record time. She loved them. I will definitely be making more.
ReplyDeleteWould the fabric cause the food in the bowl to taste different?
ReplyDeletereally????
DeleteI made several of these for gifts and kept one for myself. I keep it stored in the microwave. LOVE, LOVE, LOVE it. I do have a word of warning though & a funny story. My grandson was cooking a pizza in the oven and was using the microwave as a timer like his Grandpa taught him (Grandpa doesn't know about the timer on the stove I guess). We were chatting away in the kitchen and something started to smell like it was burning. We checked the oven and everything was fine. Then it got worse. OMG, there was a fire in the microwave!!! I didn't realize my grandson had not used 0 Power and that potholder was aflame! Fortunately the only thing that came to harm was that trusty potholder. I don't blame the potholder though. If you cook cotton for 10 minutes in the microwave without anything else in there it's going to catch fire. My mom LOVES them and uses them all the time (fire free :)). Once I get done making my Christmas gifts I'll be making some more for our house. Maybe I just won't store them in the microwave from here on out. Boys!!! :)
ReplyDeleteThese make a nice set of bowls for a gift! Directions are great; clear and concise. Thank you for sharing!
ReplyDeleteGreat tutorial. Thank you for being so specific. I am very excited to try this. haberdashery
ReplyDeleteThe manufacturer of the cotton batting I am using says a max of 2 minutes in the microwave, all else being cotton too - fabric and thread. Love your tutorial, one of the easiest have found and like the idea of bottom stitching.
ReplyDeleteHi If I use Hobbs batting (which I buy from my local quilt store) it states that it is 80 percent cotton and 20 percent polyester - will this catch fire?
ReplyDelete100% cotton only! Do not use 80/20 blends, it will melt or catch on fire.
DeleteMade some of these to put in a nonprofit auction basket and had numerous requests for more. Ditto on the stitching on the base, this will help alot with stability.
ReplyDeleteGreat idea for gifts! what seam allowance did you use?
ReplyDeleteI used the edge of my walking foot for my guide so about 3/8".
DeleteI am a teacher at a Tech and I would like to have your permission to use this in my sewing class. Would this be possible.
ReplyDeleteI taught these today, and of all the blogs I had looked at for inspiration yours was the best description! Thanks.
ReplyDelete(I have credited you with the instructions http://slikstitches.com/2016/09/the-one-where-chertsey-ladies-played.html, hope that's OK
Another GRRRRRRRReat gift idea. Thanks bunches
ReplyDeleteI have been wanting to make some of these bowls. Your instructions make it sounds so simple.
ReplyDeleteJust putting some of these together. I did not have cotton batting but had on old white flannel sheet and cut two for each. I also am putting a lock stitch at the end of each dart after they are finished. May help with shifting when being washed. Great TUT. Thanks ever so much.
ReplyDeleteThe very best instructions I've come across since I discovered these bowl holders. Thank You so much for sharing. I will be bookmarking your page and revisiting often. Once again Thank You
ReplyDeleteCan you use flannel (100%cotton) instead of regular cotton for the decorative pieces?
ReplyDeleteHi Kathy! I remember you well from the APQS Forum!! I always loved seeing your beautiful quilting.
ReplyDeleteThis tute is great!
I love this site your instruction are easy to understand. I have made 6 or 8 bowl from another site. I am looking forward to trying this site. I mostly make the 10 and 12. What great Christmas present they will make and gift to.
ReplyDeleteThank you!!!!
ReplyDeleteMy grandsons both made 2 this afternoon, will make more next weekend. Teenagers, first sewing project ever, perfect 1st project for beginners.
ReplyDeletecan you use cotton glaze thread?
ReplyDeleteThought you might like to know that a woman has since patented this, and there is a petition to have her patent revoked. (applied for in 10/2016 - issued 11/2017...it is obvious that she did not 'invent' this item. https://www.change.org/p/united-states-patent-office-revoking-of-bowl-cozy-patent-d799-278?recruiter=370864084&utm_source=share_petition&utm_medium=facebook&utm_campaign=share_petition&utm_term=share_petition&utm_content=ex50%3Acontrol
ReplyDeleteI made several of these for Christmas presents. I quilted the layers before putting the darts in and it made them special. If I give you credit may I pass your pattern on to others? Thanks so much for a great tutorial . P.Nazaroff
ReplyDelete
ReplyDeleteGreatly appreciated your wonderful and complete instructions! I use mine all the time. Keeps my tea much warmer for a longer period of time. Many thanks! MJK
I am not really a seamstress so I have a question, when you say to alternate the direction of the darts I don't understand. Could you explain please?
ReplyDeleteThere is a close up photo of exactly this under that instruction. You press a dart in one direction and the one below in the opposite direction to reduce the bulk of the fabric and batting in the seam allowance.
DeleteMy daughter sent me this site, instructions are clear and very easy to follow. I have been making for this years Christmas presents. I have included instructions and that it is 100% cotton with your site to look it up.Many thanks for your creative inspiration. From New Zealand
ReplyDeleteMade my first bowl after my sister made me a set a couple years ago. The instructions were so easy to follow. I like doing small projects as I am not a quilter but enjoy sewing and have done some simple table mats. Love the useful little projects. Thanks so much.
ReplyDelete